Have you pulled out your sewing machine during quarantine?
Many people have been making masks for their family, to help frontline workers, or as a new hobby/business.
Others have been tending to projects around the house either garment related or home decor.
As I mentioned yesterday I do have sewing skills but the machine only comes out for specific projects, not on a regular basis.
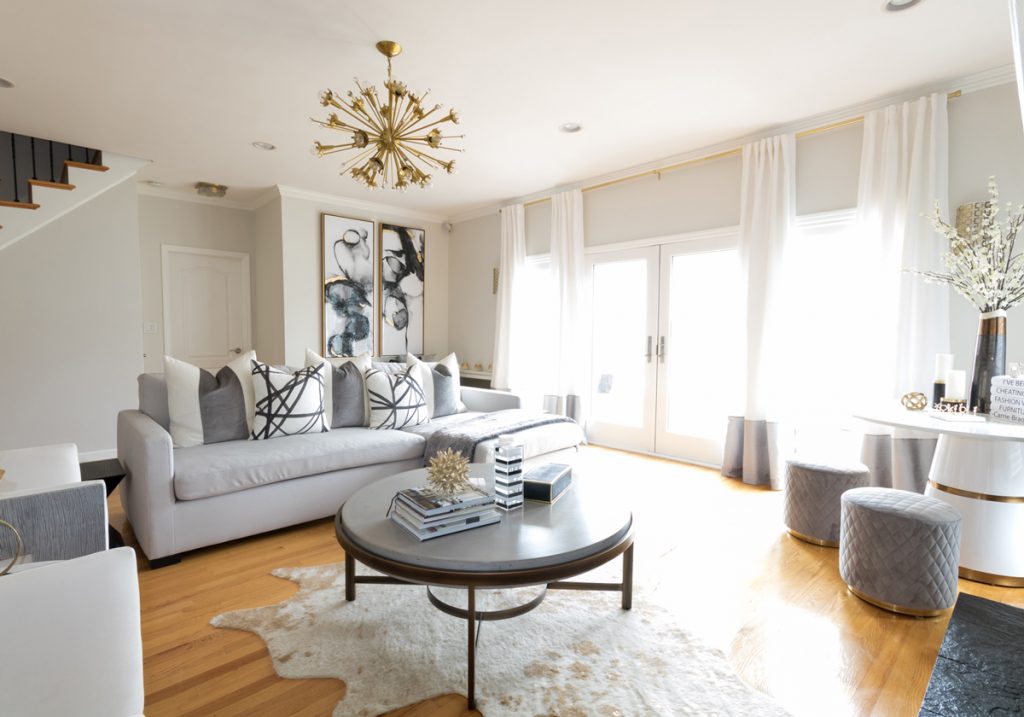
One of those projects was making pillows for the neutral Living Room makeover.
One of my design mentors in my head is Kelly Hoppen who has a signature banded pillow design that she uses in many of her designs.
When sourcing options for Willow House I invested in custom banded pillows made by Emdee International and then I made a few lumbar pillows myself.
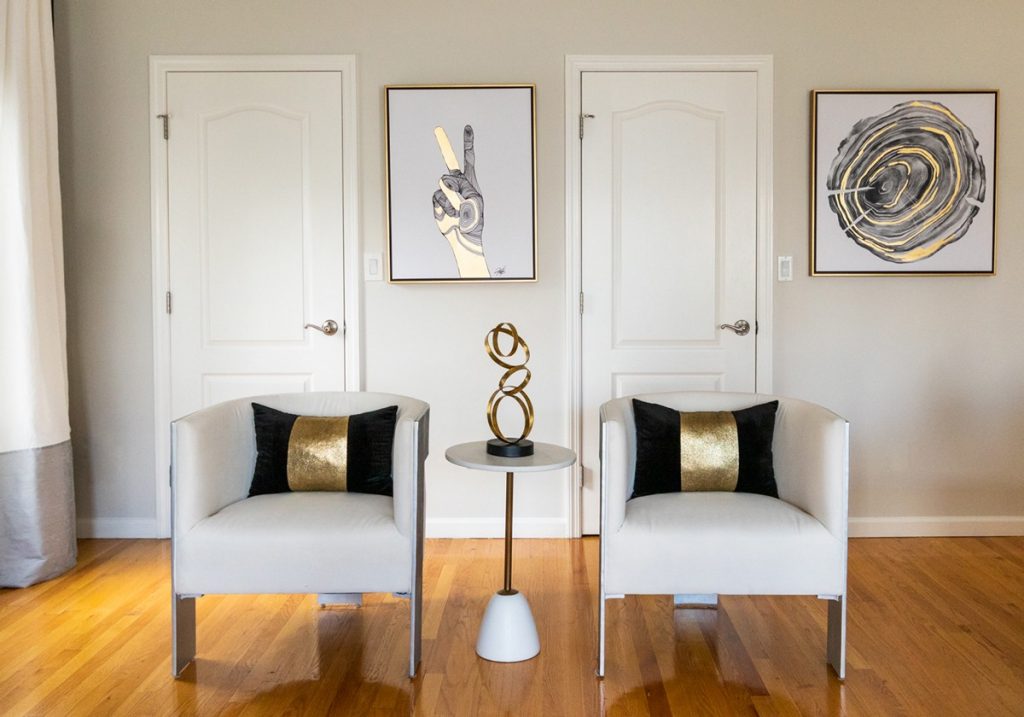
In the below image of that popular Pinterest Pin, I made the gold metallic pillow out of fabric from the old day job designing children’s clothes.
I was looking for the right shade of gold and wasn’t finding exactly what I wanted so I decided to make my own.
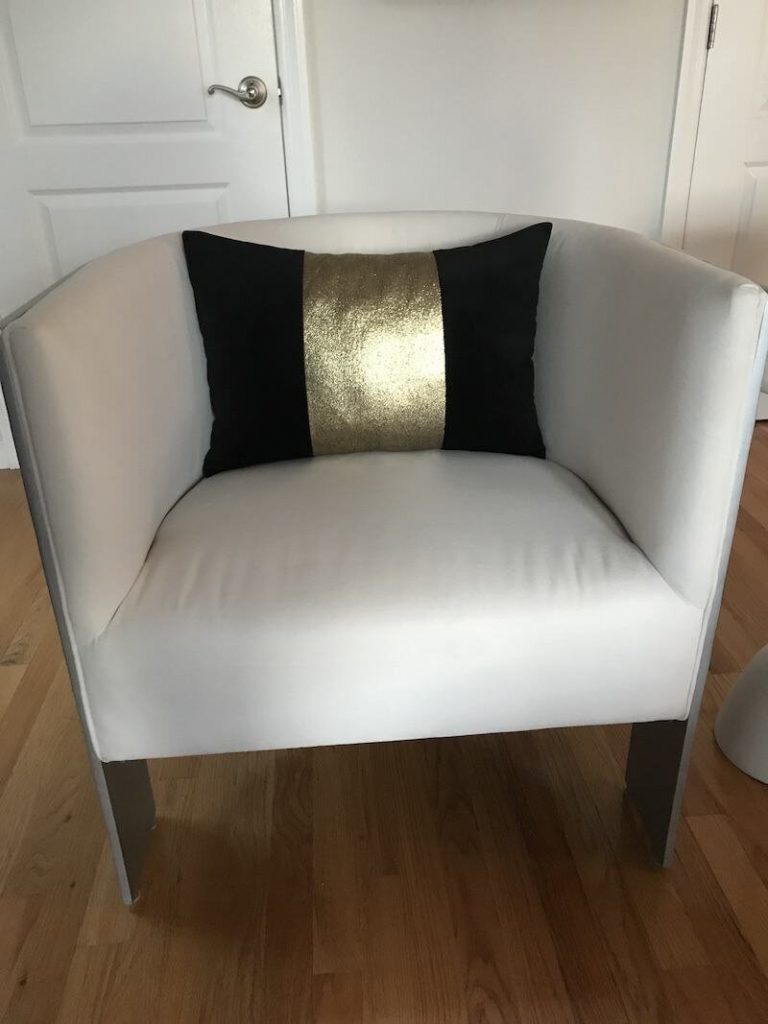
The other pillows I made are the two black velvet and gold banded pillows on the Bernhardt cosway barrel chairs.
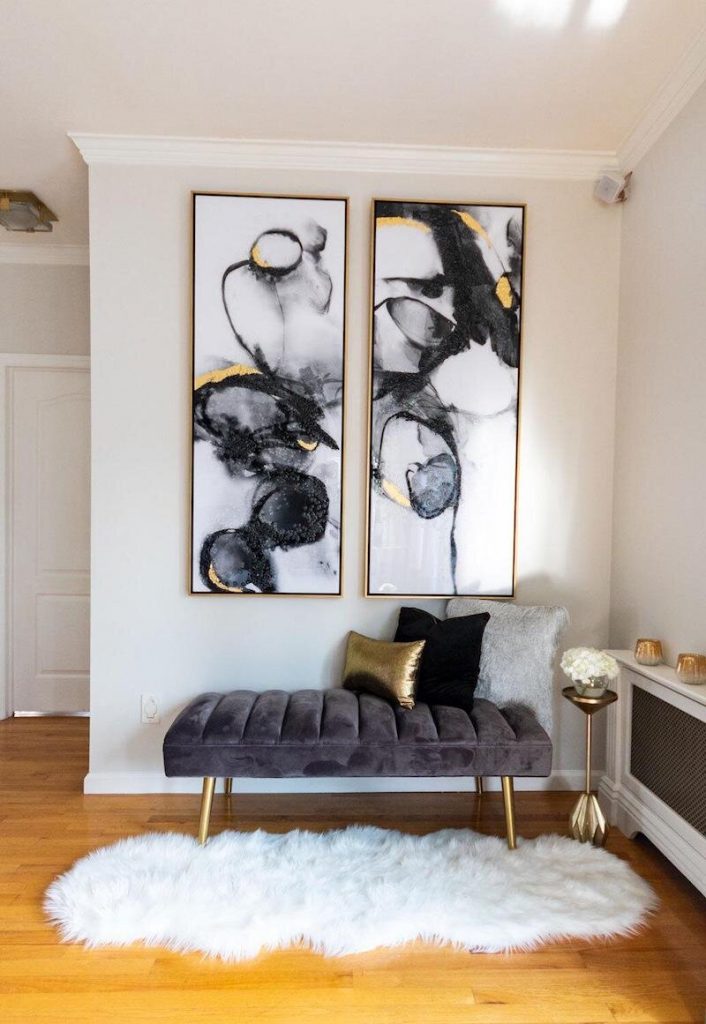
Side note: The black velvet fabric from the pillows bled onto the creme high-performance chairs. Hoping that the faint mark goes away but we will see.
I will share my favorite go-to pillow vendors in a future blog post but for today I will share the DIY pillow tutorial.
How to Make A Banded Pillow
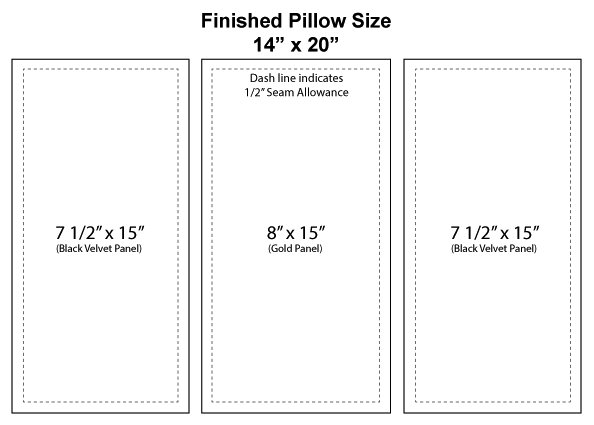
We are going to be making a 14″ x 20″ pillow using a 16″ x 22″ polyester filled form. (I like my pillow fill to be 2” larger than the pillow cover size ). You can make any size pillow that you would like. Your fabric yardages and pillow form size will need to be adjusted accordingly. I did not add a zipper closure but if you want to remove the pillow cover adding a zipper is best.
MATERIALS
-
Fabric – The amount of fabric needed depends on the pillow size. The fabric yardage I used for this project was 1/2 yard (one pillow).
-
Pillow form – My pillow form size is 16″ x 22″.
-
Thread to match the fabric
-
That Purple Thang tool
-
Rotary Cutter (optional)
-
OLFA 24″ x 36″ Double-Sided, Self-Healing Rotary Mat (optional)

INSTRUCTIONS
1. There are a few ways to start:
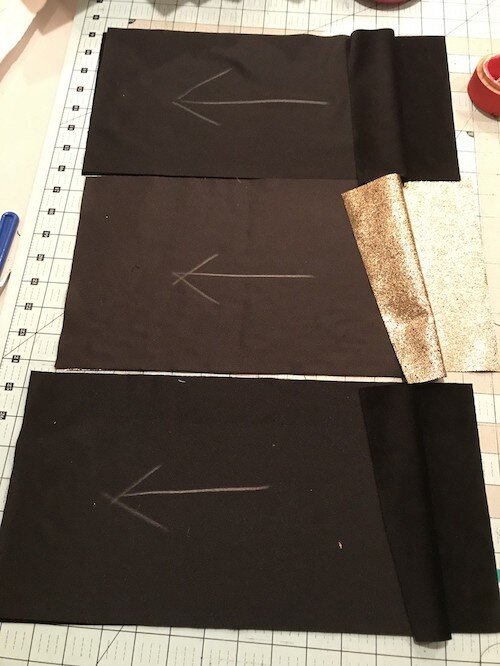
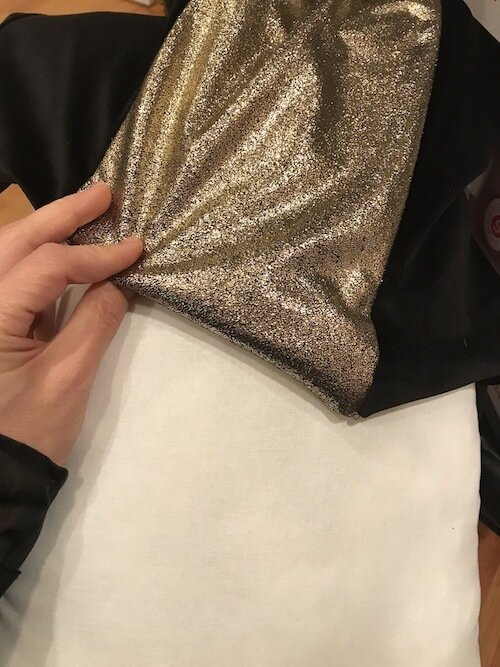
Option 1– Make paper patterns as shown below. Fold your fabric in half with the selvage edges together. Pin the pattern to your fabric and cut out the shapes along the edge. You will have 4 layers cut of black velvet and 2 layers cut of gold poly fabric.
Option 2– Fold the fabric in half and place it on the mat board lining up the edge along the line of the mat. Using your quilting ruler and rotary cutter cut out the shapes. This is the more advanced option.
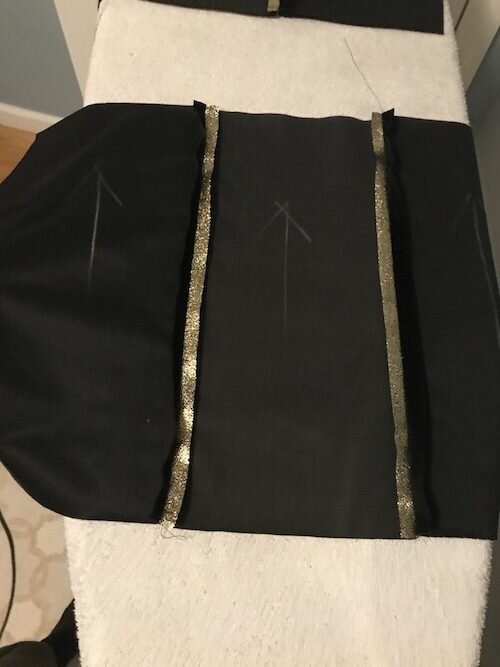
2. Use Fabric Chalk to mark your nap direction of the velvet fabric. If you do not do this and the fabric direction is opposite you will have different color shades in your pillow. It is very important to keep all velvet nap direction going the same way.
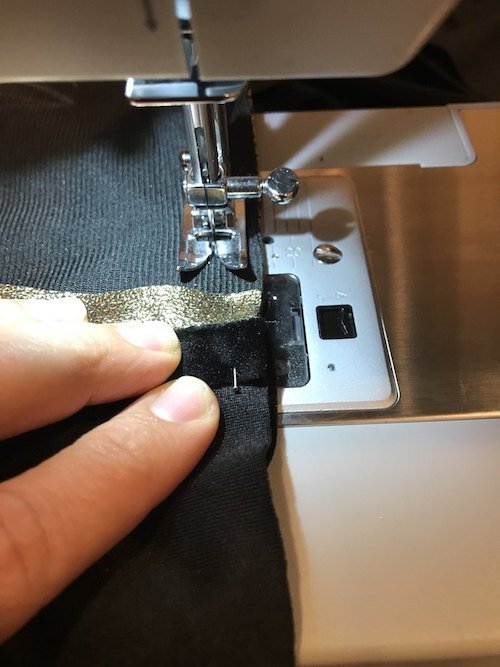
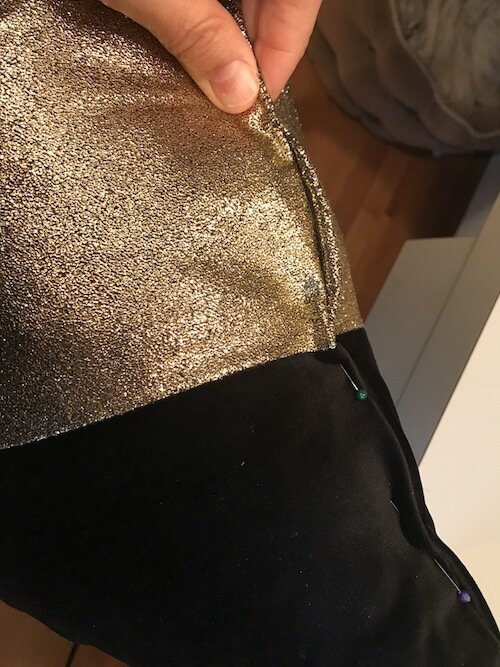
3. Next, take one layer of the black fabric and pin it to the gold fabric on the inside edges (right sides facing each other). Using your sewing machine stitch a long straight stitch with a half-inch seam allowance.
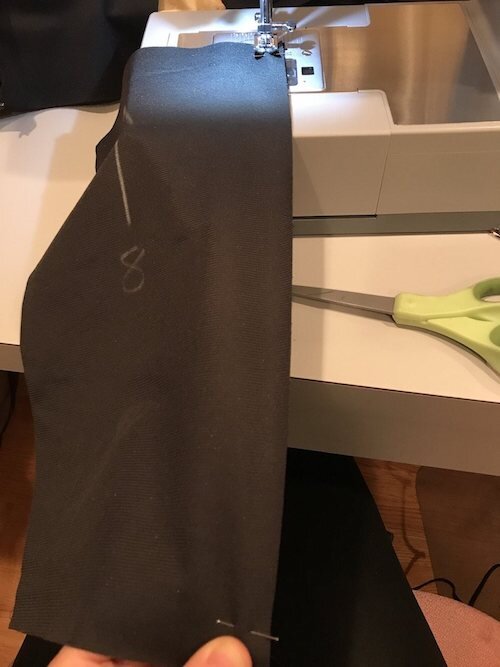
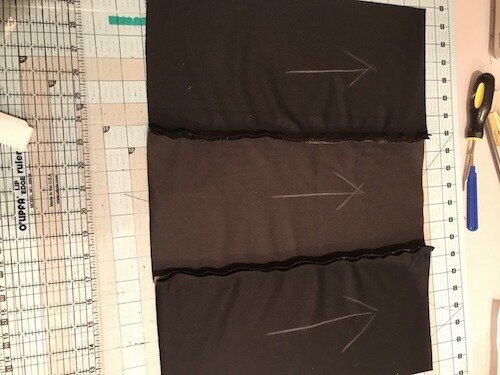
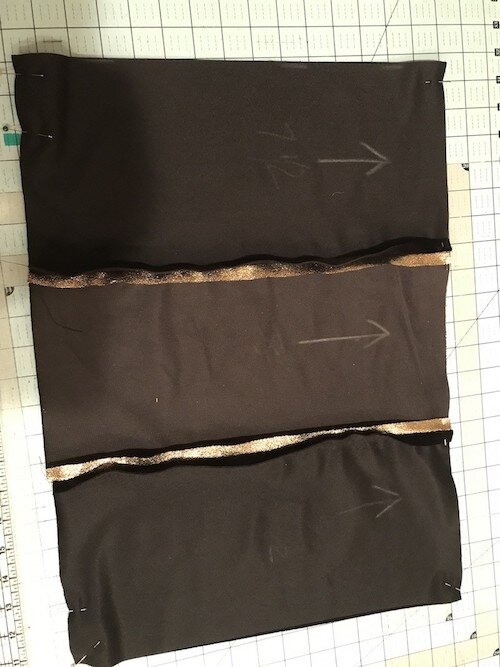
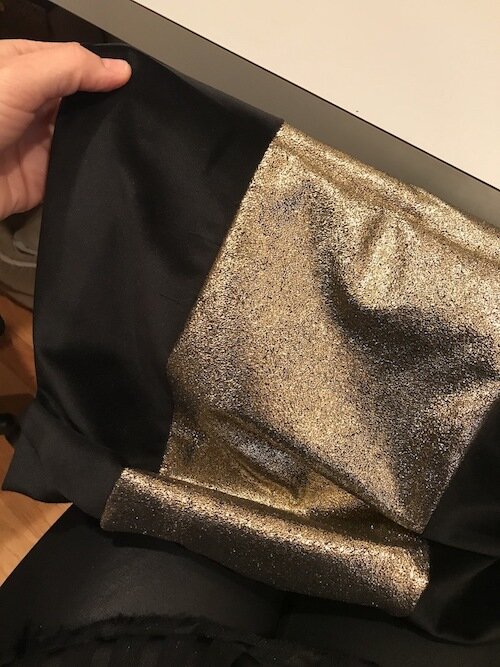
Once complete the layers will look like this.
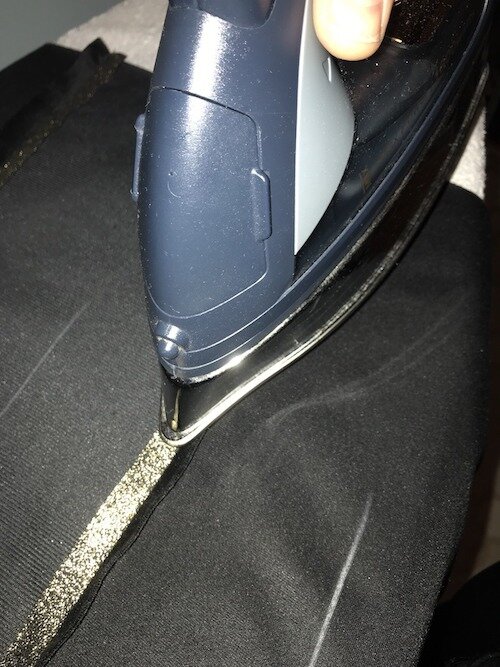
4. Next lightly hover over the spread open seams and press them flat (I use the steam setting).
Pro Tip: Test a scrap fabric to check your iron setting first so you do not imprint the fabric.
5. Pin the front and back fabric right sides together making sure your arrows are going in the same direction.
*** I keep repeating this because shade variations will occur if the fabric direction is rotated.
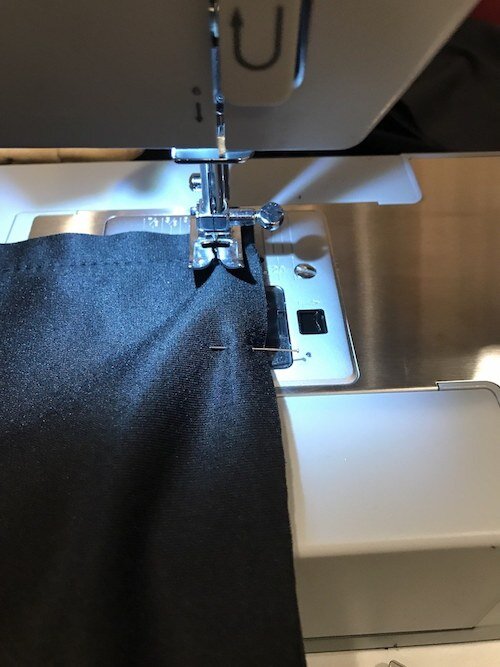
6. Using a 1/2″ seam allowance, sew the two pieces of fabric together, starting 2″ in from the corner on the bottom edge. Stopping 2″ from the last corner on the bottom edge. Leaving an opening for the pillow form. Make sure the panel seams are flat as you go.
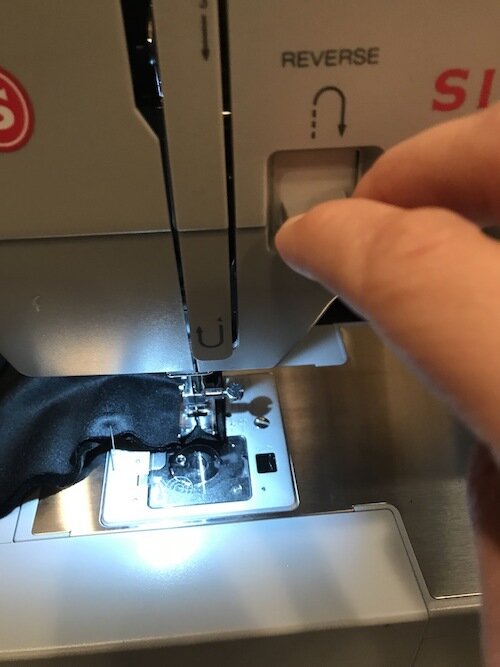
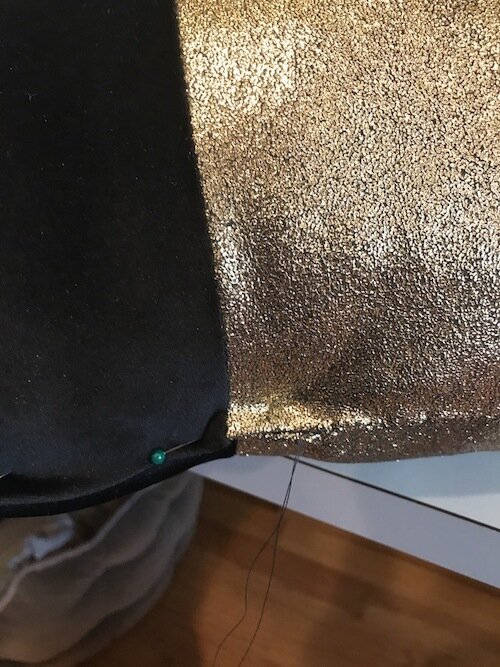
7. At the corners use the reverse stitch to reinforce the stitch line. Pull out the pins as you go along.
*** Some sewing machine needles will break if you go over the pin.
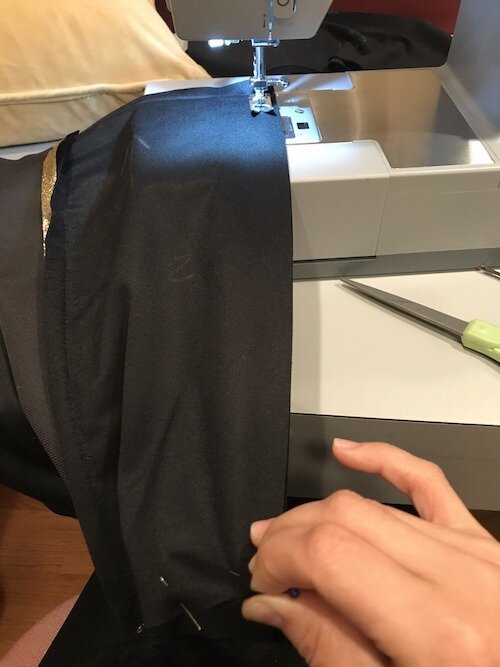
Here is what the pillow should look like after you sew around the edges.
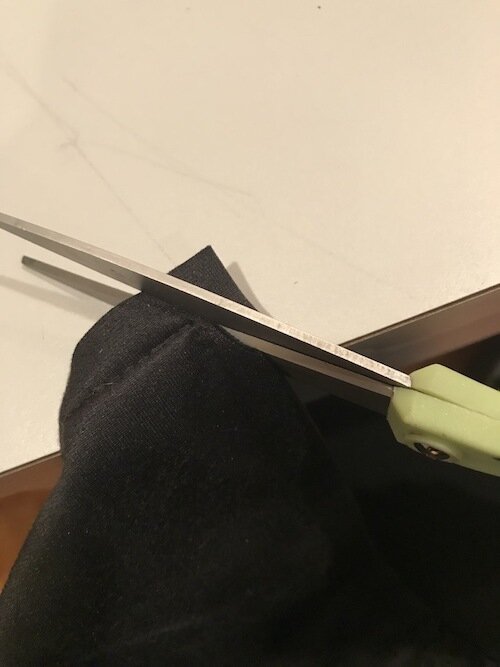
8. Trim all 4 corners, at an angle, to reduce bulk. Making sure not to cut too close to the seam stitching.
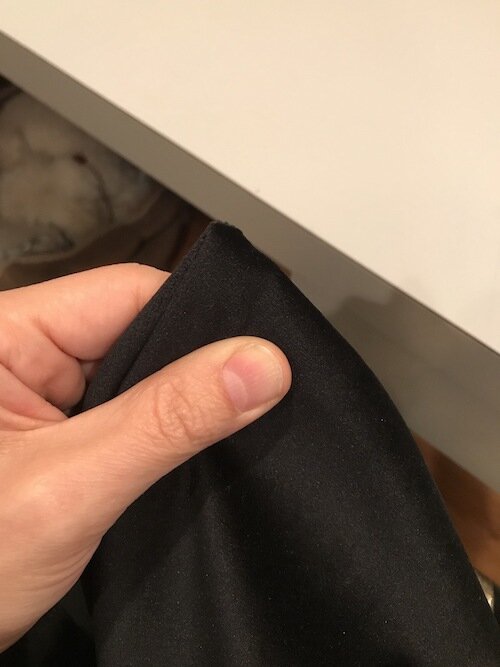
9. Making sure all pins have been removed, turn pillow right side out. It’s helpful to use something such as That Purple Thang to help turn the corners right side out.
10. Insert pillow form. If needed – add extra polyester fiberfill to fill out corners.
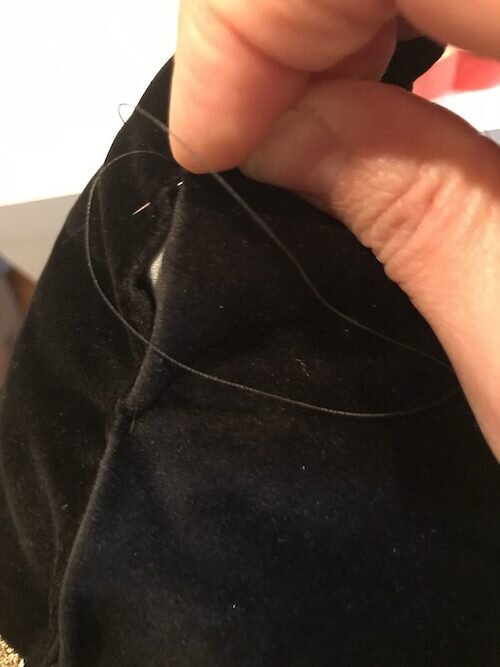
11. Fold fabric of bottom edges over 1/2″ (using the long basting stitch as a guide). Pin the two bottom edges together.
Here is the complete banded lumbar pillow!
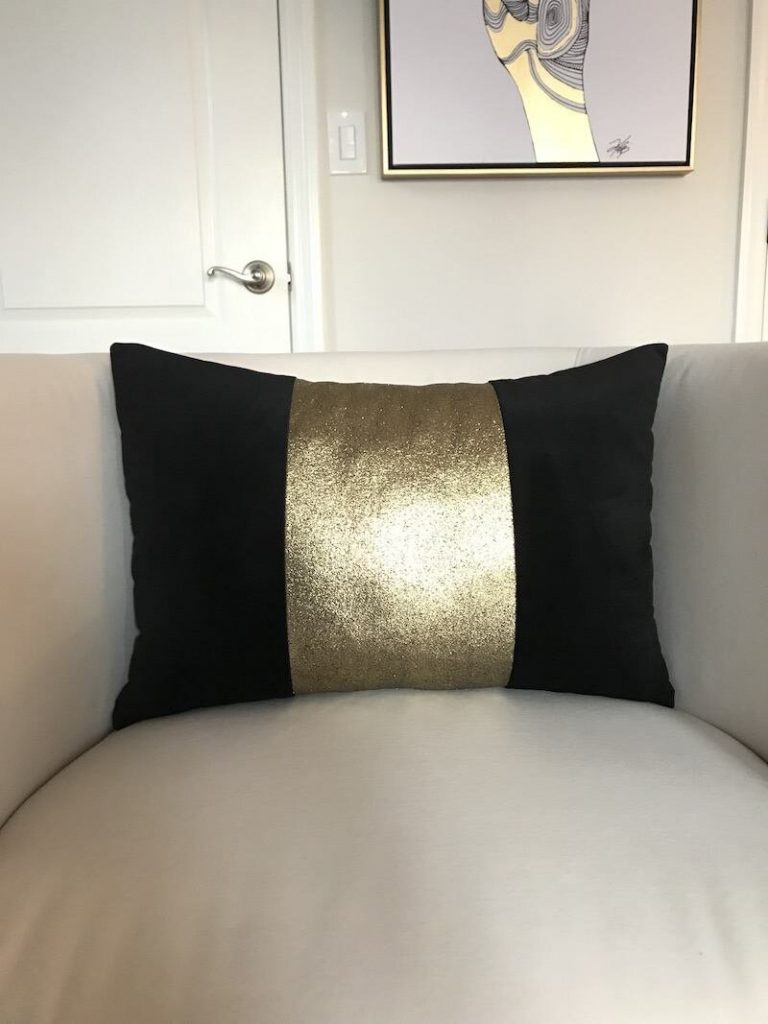
She’s so pretty!!
Product Link Details:
Pillows are a great way to update any space.
If you have the extra time right now getting those creative juices flowing is one of the best ways to stay positive during this quarantine.
I hope you are all staying healthy and well.
Have an inspired day full of Unicorns and Rainbows!
xo Nicole
For more shoppable designs check these out from my Like To Know It page.
Note: My blog periodically contains affiliate links meaning that if you make a purchase, I might make a small commission at no extra charge to you. Purchases made through them are greatly appreciated.


Leave a Reply